Recipes

6 Easy Meal Ideas - Mix N' Match Style

Do you want to be able to make a few things on a weekend and have meals to eat for the rest of the week?  I'm not talking about the same meals every night either!

The video is complete with a baby vs. mom battle over a pen. I won, for the record.  Haha!

With just a few extra ingredients, your 1-2 hours in the kitchen on a weekend can create SIX different dinners to put on the table during the hustle and bustle of the weeknights.

Tell me, what's your favorite way to meal prep?


In good health,

Tara

Oatmeal Bites


Full disclosure here...

Sometimes it gets quite tedious to feed Jagger (the baby) anything liquid-y and messy like oatmeal.  Often, his time in the highchair eating breakfast is when I like to chat about what we're doing for the day, eat my own breakfast, and/or load the dishwasher while no one is trying to crawl inside.

I decided it was about time to create another recipe that got in some healthy, breakfast ingredients in convenient, finger-food bites.

Alas, these oatmeal bites were born.

Jagger-dude polishes these off within minutes and Magnolia feels like she's getting dessert for breakfast.  I don't correct her - these could absolutely be used for a dessert at well!  

I've since experimented by adding and subbing lots of other mix-ins, and let me tell you, these bad boys are pretty versatile!  Feel free to get creative and let me know how they come out for you.

Oatmeal Bites

Ingredients:

  • 2.5 cups of quick oats (we use gluten free)
  • 1 cup pureed carrot (pumpkin or sweet potato work well too)
  • 2 large & ripe bananas, mashed
  • 1 medium & ripe avocado, mashed
  • 1 tsp. cinnamon
  • 1 tsp. baking powder
  • 2 T crushed walnuts (optional)
  • 2 T raisins (optional)
  • 1/2 large carrot, grated - save half for garnish (optional)

Directions:

  1. Preheat oven to 350 degrees F.
  2. In a large bowl, mix together dry ingredients.
  3. In a blender, mix the wet ingredients and add to dry ingredients.
  4. Spread batter in a greased, 8X8 cake pan.  (Any baking pan with an edge will be fine, just keep a close eye and adjust cooking times).
  5. Add grated carrot garnish to tops, if using.
  6. Bake for 10-15 minutes, or until top is golden brown and batter no longer jiggles.  
  7. Allow to cool for 5-10 minutes before cutting into squares (or triangles or dinosaurs…whatever will make your kiddo smile).

Enjoy!


In good health,

Tara


Watermelon "Cookies"

I've been on a watermelon kick lately, because…Summer.  Our latest creation involved the baby, the toddler, some fun cookie cutters, and MOST DEFINITELY a couple of baths afterwards.  ;-)

Check it out:

Super Green Protein Cookies

So here's the deal…my kids like cookies.  I like cookies.  There was a 2-for-1 deal on spirulina, and alas….the Super Green Protein Cookies recipe was born.  

I should mention, my investigative 3-year old does always double-check, "These are healthy cookies, right mama?".  Yes, of course!  And they're GREEN!  These cookies will awaken the inner Hulk in us all.  They satisfy a sweet or crunchy tooth without sending your blood sugar on a roller-coaster ride.

Spirulina is what gives these cookies its color and is a type of blue-green algae that comes packed with protein, vitamins A, K1, K2, B12, iron, chromium, and maganese.  With that fresh-from-the-ocean smell and taste, it's best to keep portions small and include it in recipes in which it can be camouflaged (such as these cookies or a smoothie).

I used goji berries too, to add texture, sweetness, and plant magic, but feel free to substitute with raisins or omit altogether.  The green-red combo was really pretty though!  I'm thinking I'll have to repost this recipe closer to the holidays for the Christmas celebrators.  (Can someone remind me?  I've got that mommy-brain-sleep-deprived thing going on).  ;-)

The key to the perfect crunch is allowing them to bake until the edges are golden-brown and then being patient enough to let them cool down on a cooling rack (or some other place where the air can get all around).

This recipe makes about 24 cookies.  I've had a lot of inquiries recently about serving sizes (more information to come on that).  To be technical, 1-2 cookies is a good serving for most… per sitting.  So just stand up and sit back down to have more.  Ha!  Wouldn't it be wonderful if it worked like that?!?!

Let me know if you try these and what you think.  The million $ question…did your kids like them?


In good health,

Tara

Super Green Protein Cookies

Ingredients:


Dry:

1.5 cups almond flour

½ cup ground flaxseeds

3 T dried goji berries (sub: raisins)

1 T hemp seeds

1 T chia seeds

1.5 tsp. spirulina powder

½ tsp. baking soda

¼ tsp. salt


Wet:

¼ cup coconut oil, melted

¼ cup honey

1 T vanilla


Directions:

1.    Preheat oven to 350 degrees F.

2.    In a large bowl, combine all dry ingredients and stir well.

3.    In a medium bowl, combine all wet ingredients and stir well.

4.    Add wet ingredients to dry ingredients and mix until dough is formed.

5.    On a greased baking pan, place tablespoon-sized balls about an inch apart.  Press down / flatten slightly with a fork.

6.    Bake for 10-12 minutes at 350 degrees F – until the edges are golden brown.

7.    For best results (and crunch!), allow to cool 5 minutes and then transfer to a cooling rack for an additional 20-30 minutes.

Puffed Rice Treats

Puffed Rice Treats

Puffed Rice Treats

We set out on a mission to create something new for this weekend.  With out-of-state friends coming for a visit (and one with a peanut and tree nut allergy), we decided to venture away from our usual desserts which often have nut flour or nut butter in the mix somewhere.

After seeing the packaged version of this dessert on the store shelves, I decided I would try my hand at my own version.  Puffed brown rice with no other ingredients could work as the base and sunflower seed butter would help add flavor.  Honey seemed like the perfect option to sweeten and hold it all together.

My first trial-run came out great.  So, obviously, I switched it up the real deal.  (why?!?!)  Actually, I tried to cut corners and didn't freeze them long enough before cutting and they ended up being very crumbly - but still delicious!

These are a bit sweet for me, so I plan to make them again with a lot less honey as a better (and healthier) snack option.  They may get a bit crumbly again without as much honey sticking it all together, but I don't mind the granola consistency.

***Note: Make sure to get sunflower seed butter that's not made on shared equipment in a warehouse that also makes nut butters if you're cooking for someone with food allergies.  I'm sure you all know that already!  :-/  Luckily we looked over the package together first. Although they seemed to be a hit with most, our friend with the allergy was not able to try these.  What a silly mistake!  Ugh.  Live and learn.  ;-)

Puffed Rice Treats all mixed and ready to be compacted down a bit more and frozen for a little before cutting into squares.

Puffed Rice Treats all mixed and ready to be compacted down a bit more and frozen for a little before cutting into squares.

Puffed Rice Treats

(gluten-free, nut-free, dairy-free)


Serves 16


Ingredients:


4 cups puffed brown rice

½ cup sunflower seed butter

½ cup raw honey


Directions:


1.    Pour puffed rice into a large mixing bowl.

2.    In a saucepan on the stove, bring sunflower seed butter and honey to a rolling boil.  Remove from heat.

3.    Pour sunflower seed/honey into bowl with puffed rice and stir well to combine.

4.    Spoon mixture into a pan (8x8 cake pan works well) on top of parchment paper.

5.    Using a spatula (or spoon), press down hard to compact mixture.

6.    Place in the freezer for 30-60 minutes.

7.    Remove and cut into 16 squares.  J


Do you plan on making these?  They come together in about 5 minutes.  Then just freeze for a bit and cut up into squares and you look like you've been working hard all day in the kitchen!

Let me know how yours come out.


In good health,

Tara

Banana Bread ---> grain-free, dairy-free

It's Spring break, Easter, and Passover all this week!  You may need a good dessert that doubles as breakfast and snacks for the kids this week.  It should hold up well in the freezer, be delicious, taste like a treat, and be nourishing to you, your kids, and your guests.  Am-I-right?!?!  

This Banana Bread was born out of the need to use up my mushy bananas.  I already have a freezer stash to use for smoothies and to make 'nice cream', so I wanted to make bread.  For us, it needed to be gluten-free, dairy-free, no refined sugars, full of healthy fat, protein, and fiber.  I'm fueling my busy & active body along with my family's.  And, with the things my toddler says on the regular, let me tell you, her brain is very happy with the kinds of fuel it's been getting!  ;-)  

Example from today:

Magnolia to Jagger:  "Jagger, please stop jumping in your crib.  We worked very hard for that bed and I wouldn't want to have to buy a new one and put it together again."

So, I'm sure your kiddos are just as hilarious - especially when they're getting in that good nutrition!  Leave me a comment and tell me what funny things they've said recently.  

And, make this bread immediately (if there are no egg or nut allergies in the house).  It's a good one to have on hand for a busy & special week like this one.

Banana Bread

(gluten-free, dairy-free)


Ingredients:


4 large eggs

4 bananas (ripe or overripe)

½ cup almond butter (sub: peanut butter)

4 T coconut oil, melted (plus extra to grease pan)

1 tsp pure vanilla extract

3/5 cup hazelnut flour (sub: almond flour)

1 T cinnamon

1 tsp baking soda

1 tsp baking powder

½ tsp sea salt


Directions:


1.    Preheat the oven to 350 degrees F.

2.    Combine all wet ingredients in a blender.

3.    Add dry ingredients to blender and mix well.

4.    Grease an 8X8 cake pan (ok to use loaf pan, but cooking times will vary).

5.    Pour batter into pan and bake for 35-45 minutes. (or until a toothpick inserted in the center comes out clean).  Top of bread should be golden-brown and center should be set.

6.    Allow to cool before slicing and serving. 

Matcha 'Nice Cream'

St. Patrick's Day is next week and I don't know about you, but I'm always looking for new and interesting green food ideas to make.  We're all Irish that day, right?  ;-)

With a couple of frozen bananas in my freezer that I wanted to use up, I had an idea...

But of course...Matcha Nice Cream.  This is a dairy- and gluten-free version of ice cream that you do not need an ice cream maker for!  And, get this…you only need 3 ingredients.

Ingredients:

  • 2 large bananas, sliced and frozen
  • 1/3 cup non-dairy milk (cashew milk used here)
  • 2 T matcha (green tea) powder

Directions:

  1. Combine all ingredients in a food processor or blender until creamy.
  2. Spoon into freezer-safe container.  
  3. Eat as is for a soft-serve consistency or freeze for 1-2 hours for a traditional ice cream texture.  If you're feeling fancy, use an ice cream scooper.

Enjoy this healthy sweet treat alone or with Leprechauns…whatever!  ;-)

In good health,

Tara


Marie Claire LIVE - Meal Prepping and Saving Money!

This past Tuesday, I had the opportunity to share my top tips on lowering your grocery bill and eating healthy through meal prepping LIVE on Marie Claire.  Shout out to #TheFix host, Brittney Levine and videographer, Rosa, who were as sweet as can be!  We had fun and the time FLEW!  I want to share a couple more tips with you guys that I didn't get to mention in the shoot.

1) Choose the day and time you will be going shopping.  Avoid shopping while hungry or rushed. Those hunger pangs will steer you right towards the impulse buys at the check-out counter…not wallet- (or health-) friendly.  By choosing a time when you are a bit less rushed, you will likely take a few extra minutes comparing prices and nutrition labels…key items to be successful with your shopping trip!

2) Decrease food waste.  In your planning phase, make a "use first" column that includes produce and leftovers that may go bad in the next day or two.  Be creative and find ways to use up those items before making something new.  

3) If you can't use the seen-better-days food up in time, use your freezer!  Bananas freeze well and can be thrown into smoothies or banana bread.  Veggies can be pureed into a soup and frozen that way.  What about herbs?  Divide them up into ice cube trays with some olive oil (or whatever liquid you might use them with).  This is a great tip to help your groceries last a few extra weeks and months.

What are your favorite tricks to save money while staying healthy?

Red Velvet LOVE Brownies

February is in full swing as we are approaching the middle of the month already.  How?!?  With the famous groundhog forecasting 6 more weeks of Winter, I suppose we should've been expecting the blizzard we were met with today on Long Island.

Snow and all, February is a time for love, heart-shaped everything, shades of pink and red, heart health, and lots and lots of…chocolate!!

So, what if you're on a roll with upgrading your health so far in 2017, but still looking for something that looks and tastes like an indulgence?  What if you or a family member have some food allergies / sensitivities that prevent you from being able to eat most of the store-bought or homemade recipes out there?  I hope this Red Velvet Love Brownie recipe fills that void for you!

These bad boys are gluten-free, dairy-free, high in protein and fiber, and contain healthy fats plus a full serving of veggies.  They're chocolate-y, yet low glycemic…how's that for showing your heart some love this month?!

Black beans in brownies?!?!  Yup!  They work great for texture, color, and add lots of nutrition!  

Black beans in brownies?!?!  Yup!  They work great for texture, color, and add lots of nutrition!  

Beets bring the "red velvet" hint of color while adding a bit of subtle sweetness.

Beets bring the "red velvet" hint of color while adding a bit of subtle sweetness.

Brownie batter all mixed up.

Brownie batter all mixed up.

Red Velvet Love Brownies

Ingredients:

  • 1 (15-oz) can of black beans, rinsed (BPA-free can)
  • 2 large eggs
  • 1/2 cup beets (sliced and cooked - either roast in oven or buy a jar)
  • 1/3 cup honey
  • 3 T coconut oil, melted
  • 1 T water
  • 1 tsp pure vanilla extract
  • 3/4 cup cacao powder
  • 1/4 cup unsweetened / dairy-free / gluten-free chocolate chips
  • 1.5 tsp baking powder
  • 1/4 tsp sea salt

Directions:

  1. Preheat oven to 350 degrees F.
  2. Mix dry ingredients in a large bowl.
  3. Mix wet ingredients in food processor, high-speed blender (keep scraping sides down), or with a mixer.
  4. Combine wet ingredients into bowl with dry ingredients and mix well.
  5. Pour into well-greased muffin tin or line with paper liners.  This makes adorable, round brownies with slightly crispy edges that are like getting the highly sought-after corner piece each time.  ;-)
  6. For the look pictured up top (with the heart in the middle), cut a beet slice into the heart shape and press onto top.  Other ideas for toppings include: chocolate chips, hemp seeds, walnuts, or anything else your creative mind comes up with.
  7. Bake 20-25 minutes - until edges start to pull away from muffin tin and become slightly crispy.
  8. Share with your favorite people!
Little hands couldn't wait for me to finish the photo shoot.  ;-)

Little hands couldn't wait for me to finish the photo shoot.  ;-)

Red Velvet Love Brownies with various toppings. Pictured (starting top left and going clock-wise): Walnuts, chocolate chip and hemp seeds, heart-shaped beet, chocolate chip.

Red Velvet Love Brownies with various toppings. Pictured (starting top left and going clock-wise): Walnuts, chocolate chip and hemp seeds, heart-shaped beet, chocolate chip.

Alright guys…will you dare to try these?  It is definitely "different" to bake with black beans, but they taste so chocolate-y and are healthycome on now!  Brownies for lunch, anyone?

In good health,

Tara

Game Day Recipe

Whether you're hosting your friends and family or visiting someone else to watch The Big Game (a.k.a. Superbowl) this Sunday, there's a few things that remain top of mind on this not-quite-a-holiday holiday…football, half-time shows (wardrobe malfunctions?), commercials, and…FOOD!

What are you making?  What are you bringing?

This Crunchy Cauliflower recipe is perfect for Game Day.  It works as a snack, an appetizer, or a side dish.  It's delicious as-is, or can be paired with your favorite dip or sauce if you want to be fancy.  This recipe is vegetarian, gluten-free, dairy-free, paleo-friendly, high protein, high fiber, and of course a serving of veggies!  And…it's toddler-approved (actually, toddler-obsessed!).

Crunchy Cauliflower Bites

Ingredients:

  • 1 head of cauliflower
  • 4 T coconut oil, melted
  • 1 large egg
  • 1/3 cup almond flour
  • 1/3 cup nutritional yeast
  • 1/2 tsp sea salt
  • 1/2 tsp pepper
  • 1/2 tsp paprika

Directions:

  1. Preheat oven to 425 degrees.
  2. Chop cauliflower into bite-sized florets.  Place in large bowl.
  3. In a medium bowl, combine almond flour, nutritional yeast, salt, pepper, and paprika. Mix well.
  4. Add coconut oil and then beaten egg in the bowl with the cauliflower.  Mix well.
  5. Add dry mixture from medium bowl into bowl with the cauliflower and mix until evenly coated.
  6. Spread cauliflower evenly onto a greased baking sheet.
  7. Bake 7-8 minutes, flip, and bake another 7-8 minutes.  The cauliflower should be crispy and a bit brown on the edges.
  8. Eat up!

Happy Friday, everyone!

In health,

Tara

Almond Flour Versatility

You have almond flour.  It's sitting in the back of your pantry.  It may have dust on it!?  You bought it for that recipe you made a few months ago - ya know, when you were super-duper gung-ho on your gluten-free / paleo / Whole30 / healthy-mama-and-family kick?  Now what?

Guys, almond flour is not an ingredient that should come with buyer's remorse.  It's SO versatile!  Full of plant protein, healthy unsaturated fats, and heart-and-body-loving fiber, it should be allowed into the spotlight of your food prep just a bit more. ;-) 

Almond flour can bring added nutrition and goodness in many ways:

  • Healthy baking - it's the perfect alternative to regular bleached or whole wheat flour for those with food sensitivities and those just looking to step up their health game.
  • Thickening agent - add slowly into soup, stews, dips, sauces, and even hummus if you need a slightly thicker or more dense consistency.
  • "Protein powder" - throw into smoothies, healthy fudge, in yogurt, oatmeal, energy balls, sauce…anywhere you may need a little boost in protein.
  • "Breading" - Mix with some spices and herbs for a quick and easy replacement for breading.  Make your own mozzarella sticks, breaded and baked chicken, or zucchini fries by dipping the food in egg first and then in the almond flour/herb mixture. Yum!  This is the perfect appetizer swap (hmm….SuperBowl, anyone?).


So, will you dust off that bag of almond flour (or just go ahead and buy it already)?!?!  What do you like to make with this powdered beauty?

I'd love to hear from you if there are any other ingredients that haven't been in your meal prep rotation in a while….or any products/ingredients you've been wanting to purchase, but just can't justify since you don't know what to do with it after that. ONE. recipe.  Let me know!  Maybe I'll feature it in an upcoming post.  ;-)

Make it an awesome, almond-y day!

In health,

Tara

Cake Smash Success! (Jagger Turns ONE)

Well how did THAT happen?  365 days and boom...Jagger-dude is 1 year old.  

He is the most perfect compliment to our crazy family.  His smiles and laughs make strangers smile and laugh everywhere we go.  He loves to be silly and mobile and hi big sister - well, he's a BIG fan of hers.

Some of you already know that our babies came with a little (lot of) help from science.  They were IVF miracles.  They also each survived a terrible pregnancy disease I had both times called Hyperemesis Gravidarum.  All this just to say, we are so. incredibly. BLESSED!

I believe we can find reason in everything we experience.  "If it doesn't kill you, it makes you stronger." (One of my favorite quotes since I was a kid - from Nietzsche).  Our experiences have brought me to where I am today…I value my family and our health above all else.  I know what it's like to long for each of these.

Well, hello there!  (Jagger-dude - a few months old)

Well, hello there!  (Jagger-dude - a few months old)

To my sweet Jagger Jack, Happy 1st birthday!  We knew we loved you long before you joined us Earth-side.  You've been such a bright star in our lives over the past year.  I have loved every minute of our 365 days together - watching you grow, play, and learn.  I can't wait for more todays and tomorrows with you!

Babywearing has saved me this year!  Having free hands to chase after big sis is always a good idea.

Babywearing has saved me this year!  Having free hands to chase after big sis is always a good idea.

Now on to parties and cake smashes.  Here's what I learned:

  1. January birthday parties in NY need snow dates as a back-up plan.
  2. Using blueberries to color the icing actually makes purple icing, not blue.  Jagger is a very secure little dude, he doesn't mind purple….but, it didn't quite fit into the "Winter One-derland" theme that we were going for.  ;-)
  3. Sometimes the "cake smash" turns out to be more of a cake fondle.  And that's cool!  He enjoyed it, and that's all I was hoping for.
We may have had to reschedule Jagger's party, but at least we got an unexpected day to play in the fluffy white stuff!

We may have had to reschedule Jagger's party, but at least we got an unexpected day to play in the fluffy white stuff!

I started feeling pretty nostalgic as I made this recipe - the same one I created originally for Magnolia's first birthday.  I was a newbie to healthy baking, at that time, and ended up making about 7-10 versions of this one before it was "right".  That was wayyy back in 2014.  ;-)  I've come a long way!  Now I have TWO adorable reasons to keep me on top of my healthy baking (and cooking) game.

Magnolia enjoying her smash cupcake 2+ years ago at her 1st birthday party.  It's incredibly bittersweet to see how much she's grown in body and mind and how fast our memories are piling up as the months fly by.

Magnolia enjoying her smash cupcake 2+ years ago at her 1st birthday party.  It's incredibly bittersweet to see how much she's grown in body and mind and how fast our memories are piling up as the months fly by.

This was also the start of the muffin magic.  What the heck is that muffin magic, you ask?  Well, it's figuring out that muffins can be made of all the healthy stuff you want your kiddos and your whole family to eat!  We're talking veggies, fruit, protein, healthy fats, and fiber.  I don't hide anything in there as I believe it's in the kiddos' best interest to know they are eating veggies and all the good stuff to give them the best foundation of health that you can.  So grab the little ones and let them help measure and mix and get very familiar with these healthy ingredients!

*Note: This recipe is for muffins.  Add the icing and voila - you have cupcakes!

Pumpkin Batter all mixed and ready for the muffin pan.

Pumpkin Batter all mixed and ready for the muffin pan.

"Happy birthday to you…" 

"Happy birthday to you…"


Pumpkin Carrot Muffins

Ingredients:

  • 2 ripe bananas
  • 1.5 cups pumpkin puree
  • 1/2 cup sliced carrots (optional)
  • 1 T coconut oil
  • 2 eggs
  • 1.5 cups almond flour
  • 1/5 tsp baking powder
  • 1 tsp cinnamon
  • 1/4 tsp nutmeg
  • 1/4 tsp ginger
  • 1/4 tsp sea salt

Directions:

  1. Preheat oven to 350 degrees F.
  2. Blend together all wet ingredients in a blender.
  3. In a large bowl, mix together dry ingredients.
  4. Slowly pour wet ingredients from blender into the bowl with the dry ingredients.
  5. Fill greased muffin pan (or muffins liners) 2/3 full.
  6. Bake 30 minutes.

*Makes 12 muffins.

"Is the goal to shove as much of this in my mouth as possible, mama?  'Cause that I can do!" 

"Is the goal to shove as much of this in my mouth as possible, mama?  'Cause that I can do!"


I switched up the kind of icing I made this time, as I wanted a nice shade of blue to go with our "Winter One-derland" theme.  Hmm.  That didn't work out, but it was a very pretty purple color. Haha.  And it was tasty!

Blueberry Coconut Cream Icing

Ingredients:

  • 1 can coconut milk
  • 2 T coconut oil (not melted)
  • 1 T raw honey
  • 1/2 tsp pure vanilla extract
  • 1/2 cup frozen blueberries

Directions:

  1. Place can of coconut milk upside down in fridge overnight.
  2. Carefully open can and scoop out the hardened coconut cream.  This is what you will be using for the icing.  Save the watery part to use in other recipes.
  3. Mix all ingredients in a blender (you will need to keep scraping down the sides and blending several times).
  4. If you make in advance, it's ok to refrigerate icing, just be sure to give it a good blend/whipping before you use as it will harden a bit.


Jagger seems as surprised as we are that he's ONE already!

Jagger seems as surprised as we are that he's ONE already!

Holiday Spiced Sugar Cookies

Baby it's cold outside!  And, with the holiday parties, cookie exchanges, and uber-sweet festivities practically upon us, we need a new cookie recipe!!!  

For me, baking Christmas cookies with my mom is an annual tradition and one we haven't missed for even one year.  We follow my Grandmother's recipe and I feel bittersweet knowing although I never had the chance to meet her, that we are now 4 generations of girls/women (plus Jagger and sometimes my husband) being connected every year while we follow the instructions on this well-loved piece of paper that is stained, falling apart, and very hard to read.  But, it was hers!  There are just some things that don't need upgrading.

However, with shortening, loads of butter, mounds of sugar, bleached / refined flour, and artificial food dye, I just can't let that go over with my very young toddler.  We'll reevaluate as she gets older (this motherhood thing is a constant moving target), but as for now, she eats only foods that *cause* health.  As for baby Jagger, well, he won't be eating (or missing out) on any of these cookies this year.

So, what's a sensitive-daughter-and-granddaughter slash health-conscious-mama slash Christmas-tradition-lover to do?  Come up with a new recipe that's just as fun to make, tastes like a treat, and adds some extra fuel to our day!  It's almost-Winter and absolutely cold & flu season - let's stack the deck….ok?  ;-)

These cookies are easy to make and work well with your favorite cookie cutters.  Feel free to decorate them as you choose.  

What they have: protein & fiber.

What they don't have: refined sugar, gluten, dairy, soy, flour/grains, artificial anything, trans fats.

The dough is chilled and ready to be rolled out and made into festive shapes!

The dough is chilled and ready to be rolled out and made into festive shapes!

Holiday Spiced Sugar Cookies….ready for the oven!  

Holiday Spiced Sugar Cookies….ready for the oven!  

HOLIDAY SPICED SUGAR COOKIES

Ingredients:

  • 2.5 cups almond flour
  • 1/4 cup honey
  • 1 large egg
  • 1.5 T coconut oil
  • 1/2 tsp baking soda
  • 1/2 tsp sea salt
  • 1/2 tsp pure almond extract
  • 1/2 tsp ginger
  • 1/2 tsp nutmeg
  • 1/2 tsp cinnamon
  • coconut flour (for dusting cookie cutters and rolling out)

Directions:

  1. Preheat oven to 350 degrees F.
  2. Mix all ingredients in a food processor, mixer, or with (clean!) hands.
  3. Flatten dough to about 1/3 - 1/2 inch thickness.  Cover and allow to chill in the fridge for 30 minutes.
  4. Place dough between wax paper, sprinkle with coconut flour, and roll out with rolling pin. 
  5. Dust again with coconut flour before using cookie cutters.
  6. Collect "scraps" and repeat steps 4 & 5 until all dough is used.
  7. Place cookies on a baking sheet greased with coconut oil.
  8. Decorate as desired or leave cookies plain.
  9. Bake 7-10 minutes (until edges start to turn golden-brown).  Thin cookies will cook faster - keep your eye on them.

They were a big hit and I didn't get any pictures on the finished product.  I'll take that as a good sign instead of an oversight.  ;-)

Please leave me a comment or an email if you make these cookies.  I'd love to hear about your holiday celebrations!

Peace, Joy, and Health,

Tara

Staying Healthy for the Holidays - Interviewed by Kimberly Chacon

A few weeks ago, I got the pleasure of being interviewed by a very special, local Mommy blogger.  We chatted about life, mama stuff, kiddos, and her journey as a young breast cancer survivor.  

Kimberly Chacon is a graduate of New York University.  Prior to becoming a stay-at-home mom, she taught English for ten years in New York City.  When she's not running after her 18 month old twins and eight month old baby, she blogs about kids, food, and motherhood at partyoffiveblog.com.

Thanks for taking the time to write this, Kimberly!  Here's the article and a quick picture we managed to sneak in (Kimberly, Magnolia, Jagger, and I):

I don't know about you, but winter always starts out great. I love the chill in the air and the approaching holidays, goodies, and gatherings. Then, I inevitably eat too many cookies at EVERY celebration and I fall into the "I'll get healthy in January" mindset. This year is different. I've been working hard to lose the baby weight and I don't want to go backwards. In addition to weight loss, it is also about keeping my energy up and staying healthy. So, I spoke with an expert to help me figure it out.

I sat down with Tara Allen to discuss health and winter woes. Her credentials include Registered Nurse, Certified Health Coach, Certified Personal Trainer and mom. But I want you to know something else: when you meet Tara she glows with good nutrition. Clear skin, lots of energy, and just "something"that tells you she's healthy. Additionally, I got to meet her darling kids, Jagger and Magnolia. As soon as Magnolia, three years old, sat down with her crayons she wanted to write a grocery list that included Brussel sprouts and green beans. Yes, that happened. At that moment I knew that Tara was the real deal, not just talking the talk, but walking the walk! Surrounded by kids and coffee we had a great chat.

K: Tara! Save me from myself this holiday season. I love ALL THE TREATS. I inevitably eat too many cookies and goodies at every celebration. Help! 

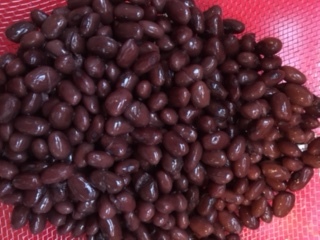
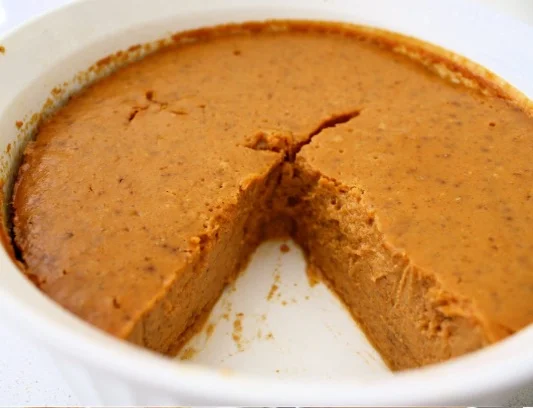
T: Don't show up to a holiday party starving. Just don't do it. Eat a light meal before and then think carefully about your choices. Choose which treat you are going to have and really savor it. If you love pumpkin pie, then wait until you have the best quality, most delicious pumpkin pie and enjoy it! Don't deprive yourself from all the treats or that will backfire. Also, always be prepared. If you know you are going out for a long day of holiday shopping, make sure to have trail mix or a fruit packed in your purse. This will help you avoid eating junk while you are out.

K: Ok, what about this dilemma? My main exercise has been walking, but now it's getting colder and it gets dark at 4 p.m. What workouts do you recommend for winter?

T: You can do workouts at home! Try this while the kids are playing: 10 push ups, 10 squats, walking lunges while wearing or holding your baby, then run up and down the stairs. Repeat this a few times during the day. There is always a way to work it in!  Alternate HIIT workouts (High Intensity Interval Training) with long walks and yoga. Also, look on Youtube for free workout videos that you can do in your living room. (Addendum: After our interview, I made it a point to try and work in these kinds of exercises and it is possible, but you have to put your mind to it. The neighbors probably thought I was crazy, but I did squats while holding the baby in the backyard and ab twists using the pumpkins after Halloween. (Tara made a video showing this on her website and I was inspired to recycle my decorations. The pumpkin workout is no joke.)

K: I am trying really hard to avoid that winter "blah" feeling this year. What are some of the things you do to stay healthy during this season?

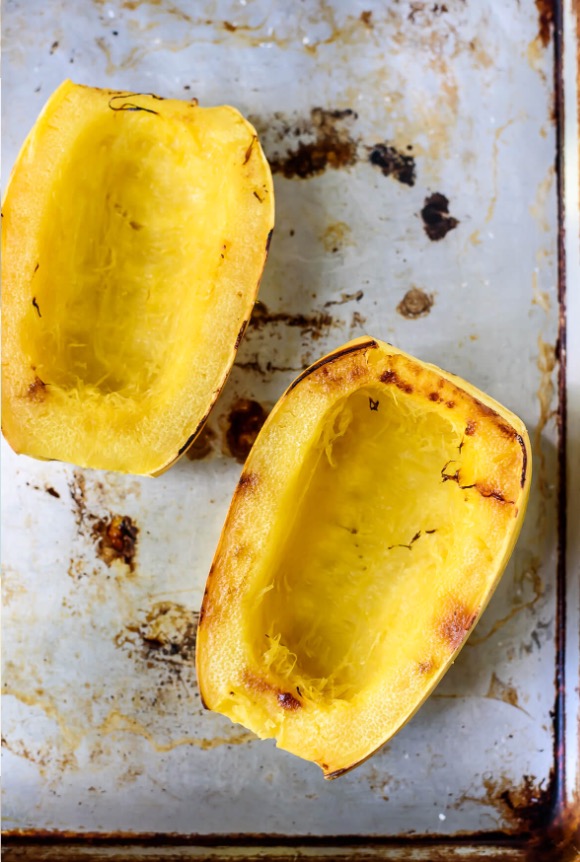
T: The first thing is that you should eat warming foods at this time of year. I am constantly roasting vegetables during winter. These are easy to pop on a baking sheet and into the oven to eat throughout the week.  I choose one temperature (usually 400 degrees F) and stagger cooking times as needed for each vegetable. In particular, I find myself making a variety of squash, most notably spaghetti and butternut squash.

My second recommendation is take more vitamin D. I love that you wrote a whole blog article about it and women need to know how important it is to their health. One source of vitamin D that people may not be aware of is pastured eggs. These are eggs from chickens that roam free. Their diet is better and makes them a great vitamin source. Also, find a great supplement that works for you. I take up to an extra 1,000 IUs daily during the winter. This helps to build your vitamin D stores when we have less access to sunlight.

K: Do you have any tips for implementing healthy holiday traditions for kids?

T: Actually, yes! My family has a strong tradition of making my grandmother's delicious recipes for Christmas goodies, but as you can imagine, those recipes are laden with shortening and white sugar. But, they are part of our family tradition, so here's what we do: we choose ONE of my grandmother's recipes to make and then make two healthy treats. We use the combination of traditional and healthy treats as gifts for friends and neighbors. This is my most popular "treat" recipe: Healthy Holiday Fudge (scroll down for recipe).

K: You write a lot about kids eating vegetables and I literally just heard your daughter ask for Brussel sprouts. How do you do it?

T: I have tried to make a practice that she eats a vegetable at every meal. I let her choose between two, so her voice is heard, but we eat them together and she loves them. She also helps me with writing grocery lists and meal planning. If you are struggling to get your little ones to eat vegetables, try my recipe for Butternut Squash Apple soup (see below). I suggest starting with it very sweet (more apples at first), then adjusting it to lessen the sweetness over time. It works! 

Thank you for all of these great tips! 

----------------------------------------------------------------------------------------------------------------------

Healthy Holiday Fudge

Ingredients:

  • ¼ cup coconut oil, melted
  • ¼ cup cacao powder
  • 2 T honey or maple syrup

 Directions:

1.    Mix all ingredients together in a large bowl.

2.    Pour into silicone molds or spread evenly in pan.

3.    Place in refrigerator for 3-4 hours (or overnight).

4.    Pop out of molds or cut into squares and place in an air-tight container.

5.    Serve right out of refrigerator, as they will melt if kept at room temperature.


-----------------------------------------------------------------------------------------------------

Butternut Squash Apple Soup


Ingredients:


  • 1 Butternut squash, raw - peeled and chopped
  • 2 apples, any kind, chopped
  • 1 large onion, chopped
  • 3 cups vegetable broth
  • 1 cup water
  • 3 T coconut oil
  • 1 tsp cinnamon
  • ½ tsp nutmeg
  • ½ tsp turmeric
  • salt and pepper to taste


Directions:


1.    In a large pot, melt coconut oil.  Sautee onion for 3-5 minutes, until translucent.

2.    Add broth, water, squash, and apples.

3.    Bring to a boil.

4.    Cover and reduce heat.  Simmer for 35 minutes.

5.    Use an immersion blender or transfer batches of soup into a blender / food processor until it is a pureed consistency.

6.    Add cinnamon, nutmeg, turmeric, and salt and pepper.

7.    Garnish with pumpkin seeds or fresh herbs.

Vegan "Cheesy" Broccoli Soup

This week brought some much-needed rain here on the East Coast of the U.S.  The trees were happy and our bellies wanted us to hunker down and eat some warm soup!  

This vegan and gluten-free Broccoli Soup brought us just the warmth and coziness we were looking for.  For Magnolia, this doubled as a dip - as everything seems to these days.  ;-)

The secret to the creaminess without the cheese in this soup is cashews!  They get soaked for a few hours, drained, and the blended with the other ingredients to get the desired texture; plus extra protein, fiber, and healthy fat!

The cashews are getting a bath before go-time!

The cashews are getting a bath before go-time!

The kiddos enjoying some comfort food!

The kiddos enjoying some comfort food!

VEGAN "CHEESY" BROCCOLI SOUP

Ingredients:

  • 2 cups cashews
  • 5 cloves garlic, minced
  • 1 medium onion, chopped
  • 3 cups vegetable broth
  • 2 cups broccoli
  • 1/2 cup nutritional yeast
  • 2 T coconut oil
  • 1 T turmeric
  • juice from 1 lemon
  • salt and pepper to taste

Directions:

  1. Soak cashews for 4 hours in enough water to cover.
  2. Drain and rinse cashews and set aside.
  3. Put coconut oil, garlic, and onions in large pot and sauté for about 5 minutes.
  4. Add vegetable broth, broccoli, nutritional yeast, salt, pepper, lemon juice, and turmeric.
  5. Bring to a boil and reduce heat to a simmer.
  6. Cook an additional 5-8 minutes - until broccoli is soft.
  7. Use an immersion blender or transfer 1/2 the soup into a regular blender.  Add cashews and blend until smooth.  *Note: Carefully cover top of blender with a towel and hold top on to prevent the hot liquid from leaking out through the top.
  8. Transfer second half of soup to blender and blend until broccoli pieces are smaller, but do not blend until smooth if you'd like more texture in your soup (for a very smooth textured soup, blend both batches completely).


Vegan "Cheesy" Broccoli Soup

Vegan "Cheesy" Broccoli Soup

Crustless Pumpkin Pie

It's the day before Thanksgiving here in the U.S. and most folks are either traveling to be closer with friends and family or hunkering down to get their meal prep on.  It's also day 3 of my GREAT and GRATEFUL week here at Tara Allen Health.  I'm grateful to have spent previous years helping patients in the hospital on Thanksgiving Day.  There's nothing quite like seeing how important you are in someone's day than when you are caring for them on a holiday while they're missing out on their own traditions back home.  Therefore, as I enjoy a day off with my family tomorrow (well, limited work - I am an entrepreneur!), I am grateful for the nurses, doctors, police officers, firefighters, and ALL service professionals that will be working hard tomorrow to keep this country running as safely and healthfully as possible.  I'm grateful for all experiences that have lead me to where I'm at currently - as a wife and mama to an infant and toddler, and a business owner that gets to CHANGE lives in the best way on a daily basis with a schedule flexible enough to allow me to "mom" when i need to "mom".  GRATEFUL!

Now to share something GREAT in celebration...

A little birdie told me you may be in a pinch for a last-minute Thanksgiving dessert recipe.  This pumpkin pie comes together quickly and is something you can feed your guests, young and old, and feel good about!  It takes about 5 minutes to prep, so throw it in the oven while you relax, chase your kiddos, or figure out how the heck to carve that turkey.  ;-)

Cheers to a peaceful, smiley, laughter-filled Thanksgiving to you all!

In health and gratitude,

Tara

CRUSTLESS PUMPKIN PIE


Crustless Pumpkin Pie


Ingredients:


15 ounces pumpkin puree (1 can)

1 cup coconut milk (full fat)

3 eggs

¼ cup honey or pure maple syrup (ok to sub with 1 T stevia for an even lower glycemic index)

¼ cup crushed walnuts or pecans

2 T chia seeds

1.5 tsp cinnamon

1 tsp ginger

1 tsp nutmeg

1 tsp pure vanilla extract

coconut oil (to grease pan)


Directions:


1.    Preheat oven to 350 degrees F.

2.    Grease baking pan with coconut oil.

3.    Mix all ingredients in blender, except crushed nuts.

4.    Pour mixture into pan and bake for 45 – 50 minutes.

5.    Top with crushed pecans / walnuts and allow to cool.

6.    Serve yourself a slice before it gets eaten all up.  ;-)

Snack Attack - Pumpkin Pudding

Raise your hand if you're on the pumpkin-everything-until-January bandwagon.

I'm right there with ya!  ;-)  If you answered no, first of all, what's wrong with you?  Kidding!  Or am I?  Regardless, you may know someone (like a child, a spouse, a friend) who DOES love pumpkin everything.  Here's a super-quick, easy, and healthy recipe that works well as a snack, a dessert, a dip for fruit, mixed into oatmeal, under granola, or on top of yogurt.  The kitchen is for creativity!  How do you plan to eat this Pumpkin Pudding?

In an earlier social media post, I promised you guys some nutrition facts.  I think there's a time and place for counting calories, protein, etc.  I don't believe it's for everyone or forever, no matter what your situation is.  I'm a strong believer in listening to your body, balancing hormones, reducing stress and cravings, and eventually being able to be so in tune with your own needs, that there's no food journaling or strict tracking needed.  That being said, it IS helpful sometime.  Example: If you want to start your health journey and have NO IDEA how many calories you take in on a typical day, you may want to track for a few days to get a baseline.  Or, as in this case, I created this recipe custom for a client of mine that has Gestational Diabetes.  She needed something high in protein, high in fiber, low in carbs/sugar, and wanted it very "pumpkin-y".  Haha!  So, here you have it...

  • 150 Calories
  • 8g fiber
  • 12g net carbs
  • 11g protein
  • 1 full serving of veggies
Pumpkin Pudding

Pumpkin Pudding

Ingredients:

  • 1/2 cup pumpkin puree
  • 4 T peanut flour (a.k.a. powdered peanut butter)
  • 1 tsp cinnamon
  • 1/2 tsp stevia
  • 1/2 tsp nutmeg or pumpkin pie spice

Directions:

1. This is the easy part - mix all ingredients together in a bowl / mug / cute cup.  That's it!  Enjoy immediately, store in fridge up to 3 days, or freeze and serve at a later date for your holiday party.

Enjoy.  In joy.  In health!

Tara

Cream of Mushroom Soup

Ladies and gents, it's November 11th / Veterans' Day... and the end of an interesting week here in America.  Thanksgiving is 13 days away and the temperatures are starting to fall here in NY.  What I'm trying to say is, bring on the soup.  All . the . SOUP!

This Cream of Mushroom Soup is a gluten-free, dairy-free version of the Thanksgiving Day classic.  Not only is it a great side dish to bring or serve for those with special dietary needs, it comes packed with protein and fiber to help you fill you up on the good stuff.  Make extra - you can freeze some to enjoy for a quick dinner when you come home late from holiday shopping. ;-)

This recipe calls for the soup to be pureed into a smooth, creamy consistency, but feel free to keep it "chunky" if you and your guests prefer it that way.  For comfort and toddler purposes, I went with the puree option this time and it worked out well.  

Toddler tip: Magnolia (3 years old now), taste-tested this recipe and helped me "adjust" the spices to her liking.  She also watched me chop the onions and garlic and put her two cents in about when the soup was done blending.  I let her lick the spoon after mixing and once I got the final chef's stamp of approval, I served her the soup over green beans.  All of this involvement requires front-loading of time - more time getting the kiddos involved in the prepping and cooking process will save you time, money, and stress of untouched meals.

Enjoy!


In health,

Tara

Cream Of Mushroom Soup to soothe the soul and enjoy this Thanksgiving! 

Cream Of Mushroom Soup to soothe the soul and enjoy this Thanksgiving!


Cream of Mushroom Soup


(Dairy-free, gluten-free)


Ingredients:


5 cloves garlic, minced

½ medium onion, chopped

2 cups mushrooms, chopped

2 cups chickpeas, cooked

2 cups cashew milk

1 cup coconut flour

2 T coconut oil

1 tsp Thyme

½ tsp sea salt

½ tsp pepper


Directions:


1.    In a large saucepan over medium heat, add oil, garlic, and onion.  Cook about 3-5 minutes (until onions become translucent).

2.    Add mushrooms and cook another 2-3 minutes.

3.    Add chickpeas, cashew milk, and coconut flour and bring to a boil.

4.    Reduce heat and let simmer for 10 minutes.

5.    Add thyme, salt, and pepper.

6.    Use immersion blender to puree (or transfer into regular blender in batches with towel firmly pressed over top of blender to prevent leakage).

7.    Enjoy as is or pour over cooked green beans or other veggies.


*This recipe is high in protein, high in fiber, and low glycemic.

Hello, November…and ALL the apples

Is it just me, or does the start of a new month make you giddy too?  It's a clean slate for personal and professional goals and brings new seasonal activities and holidays to be excited about!  November is synonymous with celebration in my household - from my husband's birthday, to Thanksgiving, a season of gratitude and reflection, the start of Christmas music and decorations, and delicious, yummy-smelling, warming comfort foods!

Did you get to go apple picking this year?  Or maybe you'll be heading to a farm or farmer's market next weekend?  There's always a joy in picking the perfect apples and then a bit of confusion that sets in when you try to decide what to do with your robust harvest, right?

I have a solution...

Spiced Crockpot Apple Cider - Tara Allen Health

Spiced Crockpot Apple Cider - Tara Allen Health

Spiced Crockpot Apple Cider

Ingredients:

  • 18 cups water
  • 12 medium apples
  • 2 oranges
  • 3 cinnamon sticks
  • 1 tsp nutmeg
  • 1 tsp cloves
  • 1/2 tsp ginger
  • 1/2 tsp cardamom
  • pinch black pepper

Directions:

  1. Slice apples and oranges.
  2. Place all ingredients in crockpot.
  3. Cook on low for 7-8 hours.  Warning: You house will smell so amazing at this point that you're likely to cancel all plans and stay home. :-)
  4. Strain all contents through colander into a large bowl.
  5. Strain once again through a nut milk bag or cheesecloth into a large bowl.
  6. Your cider is waiting for you!

"But Tara, I don't want to waste all the fruit and spices!"

Yup…I hear ya.  Throw it into a pitcher with red wine (or seltzer for an alcohol-free option) for a festive Sangria.

You're welcome.

Do you want to make sure you don't miss more recipes like this? Join the newsletter!  It's a healthy / food-y / family-y / fitness party in your inbox.


Enjoy in health,

Tara

Spaghetti Squash Hack

SpaghettiSquash.jpg


These suckers are fun, delicious, versatile, did I mention fun?!  :-)  But, have you noticed none of your knives seem to be able to cut them open?  It used to take longer for me to cut open the vegetable than it did for my oven to preheat to 400 degrees!

Until now...

Try this: Score the spaghetti squash all the way around with your knife.  Then throw it in the microwave for 3.5 minutes.  (Carefully) remove and resume cutting.  It's not as seamless as getting through a banana, but you'll notice a big improvement.

Then, just place the two halves on a baking sheet and bake at 400 degrees for 40-50 minutes.

Some ideas for toppings:

  • tomato sauce and cheese
  • avocado, cilantro, and garlic
  • olive oil, lemon juice, salt, and pepper
  • baked apples, cinnamon, and coconut oil for a sweet version
  • dill yogurt sauce with chopped cucumbers
  • pumpkin puree, cinnamon, nutmeg
  • hummus and sriracha for an uber-quick, creamy / spicy dish

Now that I saved you 10,561 hours of cutting time, what do YOU plan to make with the spaghetti squash?  Bonus points for creativity.  ;-)