Recipes

Maple Sea Salt Fudge

Hey there,

Ready for the holidays yet?  Me neither!

If you are new to my site, I’d like to take this opportunity to invite you to join my free newsletter list. My newsletter is where I share SO MANY more of my healthified recipes and wellness tips to get you healthy, fit, and strong! It’s a one-stop shop. ;-)

And while you’re at it, you might as well join my private facebook group, Lean In with Tara Allen Health, too! Inside you’ll find weekly challenges to optimize your body and mind, more recipes, and fun fitness Fridays.

Alrighty, so what if you had one more, quick & easy, healthy, NO BAKE dessert recipe in your arsenal to have at your fingertips for the remainder of the parties and gatherings?  

I love to have some desserts in the freezer - especially this time of year!  This helps cut back on the last-minute prep stress and means that if someone stops by last minute or we're running out and want the kids to be able to partake in dessert too, we have some options on hand.

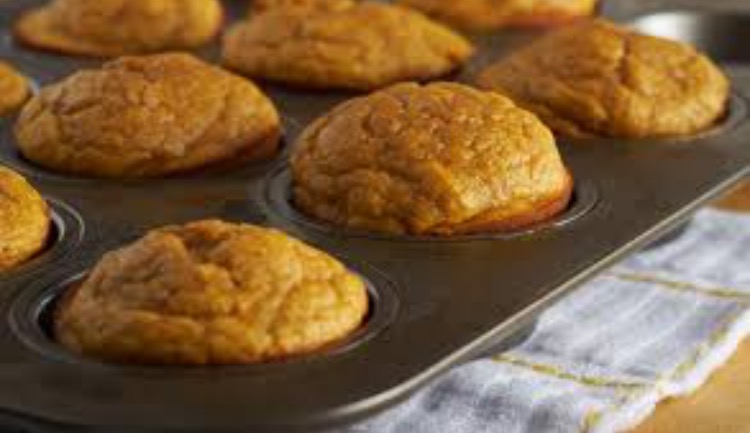
This Maple Sea Salt Fudge is sooooooo satisfying!  It's delicious and festive, plus it's full of protein and healthy fats to help keep you from devouring the cookie platters you just worked so hard to create.  :-)

<< These are gluten free, dairy free, vegan, and paleo>>

Don't they LOOK amazing too?!

Fudge.jpg

Maple Sea Salt Fudge

Ingredients:

1 cup almond butter

1/2 cup cashew butter

1/2 cup coconut oil (melted then cooled to room temp.)

1/4 cup pure maple syrup

1.5 tsp pure vanilla extract

1 tsp sea salt (optional: extra for garnish)


Directions:

1. In a large bowl, mix together nut butters, maple syrup, and coconut oil.

2. Mix in vanilla and sea salt.

3. Line a cake pan (8X8 works well) with parchment paper.

4. Spread mixture evenly into cake pan.  

5. Optional: Garnish with sea salt.

6. Place in freezer for 1-2 hours.

7. Cut into squares (using a warm knife). Place remaining squares back into the freezer to store.


Let me know if you try these! 


In holiday cheer and good health,

Tara

Holiday Spiced Sugar Cookies

Hey you,

It wouldn't be a holiday season without using our favorite cookie cutters or making a complete flour-y mess of the kitchen floor with the kiddos, would it? ;-)

These Holiday Spiced Sugar Cookies will hit the spot!  They are doughy / soft and just a bit sweet...nothing that will send you into that sugar craving downward spiral.  Bring them along to your next holiday party or cookie exchange....and double the batch to keep some extras at home!

<<These are gluten-free, grain-free, dairy-free, and soy free.>>

In Joy and Health,

Tara

HolidaySpicedSugarCookies.JPG

Holiday Spiced Sugar Cookies

Ingredients:

2.5 cups almond flour

¼ cup honey

1 large egg

1.5 T coconut oil

½ tsp pure almond extract

½ tsp baking soda

½ tsp sea salt

½ tsp ginger

½ tsp nutmeg

½ tsp cinnamon

coconut flour (for rolling out and dusting)


Directions:

1.    Preheat oven to 350 degrees F.

2.    Mix all ingredients in a food processor, mixer, or by hand.

3.    Flatten dough to about 1/3 – ½ inch thickness.  Cover and allow to cool in fridge for 30 minutes.

4.    Place dough between wax paper, sprinkle with coconut flour, and roll out with a rolling pin.

5.    Dust again with coconut flour before using cookie cutters.

6.    Collect “scraps” and repeat steps 4 & 5 until all dough is used.

7.    Place cookies on a baking sheet greased with coconut oil or lined with parchment paper.

8.    Decorate as desired or leave cookies plain.

9.    Bake 7-10 minutes (until edges start to turn golden-brown).

Almond Coconut Bliss Balls

Hellooooooooooooooo!

It's December 3rd.  Yup.  Go check, I'll wait.

:-)

Well, sometimes you need a break from the fancy-schmancy cookies and pies that turn your kitchen upside down and your floors into a flour skating rink.

I feel ya.

Try these Almond Coconut Bliss Balls!

These are a delicious snack or dessert and require NO BAKING!  They come together quickly, so they work wonders when you're in a pinch and need to bring something sweet to your office potluck, your next holiday party, or just to have something on hand for out-of-towners.

<<<These are gluten-free, dairy-free, egg-free, soy-free, grain-free, no refined sugar, vegan>>>

Enjoy!

In good health,

Tara

AlmondCoconutBliss.jpg

Almond Coconut Bliss Balls


Ingredients:

1 cup coconut flakes (unsweetened)

½ cup almond flour

2 T honey

2T coconut oil

1 tsp pure almond extract

½ tsp cinnamon


Directions:

1.    Mix all ingredients together in a large bowl.

2.    Refrigerate for 30 minutes to harden.

3.    Roll into balls (approximately 1 T each).

4.    Place in freezer on a wax paper covered plate for at least 1 hour.

5.    Keep in container in freezer or refrigerator and serve cold (will melt if left out too long).

THE Chocolate Chip Cookie

Hey all,

How was your Thanksgiving?  We had a great time making memories, eating food, seeing family...ya know, checking all the boxes.  ;-)

Truth be told, Thanksgiving is probably my favorite holiday.  I don't eat turkey or go to the parade. I can't even have most of the desserts anymore with my food sensitivities.  BUT, a holiday that we've turned into counting our blessings that also gives us a 4-day weekend together and marks the beginning of the Christmas / New Year's festivities?  Now that's what I'm talking about!

If you follow me on Facebook or Instagram, then I hope you saw my post yesterday where I thanked YOU for being in my life.  The support, comments, emojis, questions, and presence I feel and get from you is what makes everything I do so much fun.  If I know you are making and enjoying the recipes I create, I will keep 'em coming!  When I hear that my workouts helped you get healthy, lean, & strong, they'll be more where those came from.  Every message and email where you allow me to step into your world for a moment by sharing something about your health journey is a blessing.  And for that, I'm thankful.

Enough of the sentimental stuff, right?!  You want this recipe!

The chocolate chip cookie is such a staple this time of year during parties, gatherings, and cookie exchanges.  Heck, even Santa stops to nibble as he's stuffing presents under the tree and navigating our chimneys and all.  

This year I set out to create the perfect chocolate chip cookie for my family (and maybe yours?).  It needed to be gluten and dairy free.  No refined sugar.  And, as we came to find out, no coconut oil if I wanted my husband to like them too (and I did!).

So, after countless attempts and notes and crumb-filled counters, I think I nailed it!  Based on the speed at which these disappear, even amongst those that swear they don't eat anything 'healthy', I'd say they pass the test.  

I hope you and your family agree.

Do you plan to make these?  Please let me know!  Share a picture on Facebook or Instagram and tag me!  It would make my day.  :-)

In health and holiday cheer,

Tara

ChocolateChipCookies.JPG

THE Chocolate Chip Cookie

Makes 36 cookies (plus an extra nibble of the raw cookie dough)

Ingredients:

Dry:

4 cups almond flour

1-cup chocolate chips (choose carefully… or make your own)

1 tsp. baking soda

½ tsp. sea salt

¼ tsp. ginger

Wet:

½ cup avocado oil

1/3-cup maple syrup

4 tsp. vanilla


Directions:

1.    Preheat oven to 350 degrees F.

2.    In a large bowl, mix dry ingredients together.

3.    Add wet ingredients to dry and mix until well combined.

4.    Place tablespoon-sized balls onto a baking sheet lined with parchment paper.

5.    Use hands to flatten balls to make cookie shape (these cookies will not change shape much at all when baking).

6.    Bake for 12 minutes (edges should look golden-brown).


***These are gluten free, dairy free, egg free, vegan, grain free, and contain no refined sugar!

Crustless Pumpkin Pie... and a Thanksgiving Travel Workout

Thankful and Grateful...


I want to take a moment to say THANK YOU for signing up for being part of my community here on the inter-webs.  I look forward to creating even more recipes, workouts, videos, and all-things-womens-health moving forward….so that I can share it all with you!

If you're hosting on Thanksgiving this year, or maybe just want to bring along a dessert that you know you'll enjoy, this Crustless Pumpkin Pie recipe will hit the spot!  Best of all, it's gluten free, dairy free, soy free, and contains no refined sugar.  If you or any of your friends or family are avoiding these categories of food for health reasons, you'll be the hit of the party for serving (or bringing) a dessert that they can have.  :-)
 

Check out my Crustless Pumpkin Pie recipe here.
 

----------------------------------------------------------------------------------------------------------------

Are you traveling this holiday season?

Did you catch my video that includes a quick & easy full-body workout? It's perfect for hotel rooms or extended family's bathrooms…whichever!  ;-)

You can watch that right here.

Cheers to a peaceful, laughter-filled holiday!

In health and gratitude,
Tara

You're Invited: 25 Tips to Stay Healthy During Holiday Travel

With Thanksgiving Day right around the corner (11 days away, to be exact), many people are finalizing plans to hit the road via plane, train, automobile, or all of the above to visit loved ones and tolerated ones alike.  :-)

Many of my clients tell me it's the hustle and bustle and travel of the holiday season that sets them back further than the actual holidays themselves when it comes to their health goals. Can you relate?  Me too!

Eat Real Food.JPG

So, I have put something together for you!

Starting tomorrow, inside my private community on Facebook, we will be taking the whole week to talk about ways to stay on track while you make your rounds this holiday season.

To get in on the fun, join this (FREE) group of awesome ladies that are striving to take better care of themselves and their families.

Hope to see you inside the group!

In good health,

Tara

Lentil - Veggie Soup

When does soup season officially start in your household?  My car said it was 45 degrees outside yesterday morning when I was up and out early.  Commence souping!  

I've been focusing on natural immunity boosting this past week with my private Facebook community, Lean In with Tara Allen Health.  The omnipresent echo of late October sniffles always seem to inspire my most nurturing of recipes.  Besides the winning ingredients (garlic, spices, plants, protein) in this next recipe, the fact that it is a soup - a hot liquid - will be key in helping to fight off some germs.  When we bring a mug of something nice and hot close to our face (no burning yourself though, deal?!), the steam helps to kill off those pesky buggers that like to hang out in our nostrils and cause head colds.  So, take your time with your soup or tea or coffee and try to inhale as you canoodle with your warm cup of ANYthing. :-)

Here's a soup recipe that I happen to love.  I wanted something warming, hearty, plant-based, and free of dairy and gluten so my whole family could partake.  If it passes that taste-test for your family, make it in large batches next time around and freeze some so if/when you ARE feeling under the weather, you have this on the ready and don't even have to worry about cooking.

Lentil-Veggie Soup Immunity.jpg

***Lentil-Veggie Soup***


Ingredients:


1 pound lentils, rinsed

2 quarts broth (chicken, veggie, whatever)

1 cup onion, chopped

1 cup tomatoes, chopped

1/2 cup celery, chopped

1/2 cup carrots, chopped

3 cloves garlic, minced

3 T olive oil

2 tsp sea salt

1/2 tsp cumin

1/2 tsp chili powder


Directions:


1. Pour olive oil in bottom of large saucepan on stovetop (medium heat).

2. Add carrots, celery, onion, and garlic, and cook about 5 minutes (onions should become slightly translucent).

3. Add all remaining ingredients.

4. Bring to a boil, then reduce heat to low.

5. Cook an additional 30-35 minutes on low.

6. Serve as is for a chunkier consistency.  Or, use an immersion blender (or transfer to a blender in batches) for a smoother consistency (picky toddlers, anyone?). ;-)

7. Freeze any leftovers that won't be eaten over the next few days.


Pumpkin Cider Muffins

We've made it through our first official week of Autumn.  The older I get, the more I realize that I'm a Fall kinda person.  The Summer is nice and all (hello beaches and flip flops and berries), but there's just something about the Fall that's refreshing.  I like rediscovering my sweaters that were hibernating during the hotter days and I really like when the barista knows that the latte I just ordered is supposed to be hot.  In the Summer, it always seems to puzzle people that I still enjoy a hot cup of coffee!

Driving around town, I get excited to see the Halloween and Fall decor on suburban stoops everywhere as we begin several months of back-to-back holidays to look forward to.  There are bails of hay, some semblance of a colorful leaf kid's craft hanging on the door, and pumpkins - one for each family member - lined up on the steps.  I love that.  In fact, that's the extent of the future for all the pumpkins we hunted for today.  For the following recipe, I highly recommend purchasing (organic, BPA-free) pumpkin puree.  Unless, of course, you're a glutton for punishment and lots of extra work...??

I dreamt up these Pumpkin Cider Muffins when I was feeling left-out for seeing cider-everything.  Don't get me wrong, I can get down with some apple cider, but where did the cider doughnut craze come from?  

Here's what I needed... a healthier, tasty, Fall-like baked good that made my house smell like one of those toxic candles that we no longer buy.  If it was healthy enough to work as breakfast, a snack, or dessert and could be made in batches and frozen so I don't have to make them 28 times this season....even better!  

Hope you enjoy these Pumpkin Cider Muffins as much as my family does.

Happy All-Things-Pumpkin Season!


In good health,

Tara

PumpkinCiderMuffins.jpg

Pumpkin Cider Muffins


Ingredients:

  • 1.5 cups pumpkin puree
  • 6 eggs
  • ½ cup honey
  • 6 T coconut oil, melted
  • 2 tsp apple cider vinegar
  • 2 cups almond flour
  • 1 cup coconut flour
  • 1 tsp baking soda
  • 2 T cinnamon
  • 2 tsp nutmeg
  • ½ cup walnuts

Directions:

1.    Preheat oven to 350 F.

2.    In a large bowl, combine all ingredients. Mix well.

3.    Spoon batter into paper-lined muffin tin (or grease muffin tin).

4.    Bake for 22 – 25 minutes (until golden brown and toothpick inserted comes out clean).

5.    Optional: Serve with nut butter and hemp / chia seeds on top to increase protein content.

Like this recipe?  Sign up below for my newsletter list to receive more delivered straight to your inbox!

6 Easy Meal Ideas - Mix N' Match Style

Do you want to be able to make a few things on a weekend and have meals to eat for the rest of the week?  I'm not talking about the same meals every night either!

The video is complete with a baby vs. mom battle over a pen. I won, for the record.  Haha!

With just a few extra ingredients, your 1-2 hours in the kitchen on a weekend can create SIX different dinners to put on the table during the hustle and bustle of the weeknights.

Tell me, what's your favorite way to meal prep?


In good health,

Tara

Oatmeal Bites


Full disclosure here...

Sometimes it gets quite tedious to feed Jagger (the baby) anything liquid-y and messy like oatmeal.  Often, his time in the highchair eating breakfast is when I like to chat about what we're doing for the day, eat my own breakfast, and/or load the dishwasher while no one is trying to crawl inside.

I decided it was about time to create another recipe that got in some healthy, breakfast ingredients in convenient, finger-food bites.

Alas, these oatmeal bites were born.

Jagger-dude polishes these off within minutes and Magnolia feels like she's getting dessert for breakfast.  I don't correct her - these could absolutely be used for a dessert at well!  

I've since experimented by adding and subbing lots of other mix-ins, and let me tell you, these bad boys are pretty versatile!  Feel free to get creative and let me know how they come out for you.

Oatmeal Bites

Ingredients:

  • 2.5 cups of quick oats (we use gluten free)
  • 1 cup pureed carrot (pumpkin or sweet potato work well too)
  • 2 large & ripe bananas, mashed
  • 1 medium & ripe avocado, mashed
  • 1 tsp. cinnamon
  • 1 tsp. baking powder
  • 2 T crushed walnuts (optional)
  • 2 T raisins (optional)
  • 1/2 large carrot, grated - save half for garnish (optional)

Directions:

  1. Preheat oven to 350 degrees F.
  2. In a large bowl, mix together dry ingredients.
  3. In a blender, mix the wet ingredients and add to dry ingredients.
  4. Spread batter in a greased, 8X8 cake pan.  (Any baking pan with an edge will be fine, just keep a close eye and adjust cooking times).
  5. Add grated carrot garnish to tops, if using.
  6. Bake for 10-15 minutes, or until top is golden brown and batter no longer jiggles.  
  7. Allow to cool for 5-10 minutes before cutting into squares (or triangles or dinosaurs…whatever will make your kiddo smile).

Enjoy!


In good health,

Tara


Watermelon "Cookies"

I've been on a watermelon kick lately, because…Summer.  Our latest creation involved the baby, the toddler, some fun cookie cutters, and MOST DEFINITELY a couple of baths afterwards.  ;-)

Check it out:

Super Green Protein Cookies

So here's the deal…my kids like cookies.  I like cookies.  There was a 2-for-1 deal on spirulina, and alas….the Super Green Protein Cookies recipe was born.  

I should mention, my investigative 3-year old does always double-check, "These are healthy cookies, right mama?".  Yes, of course!  And they're GREEN!  These cookies will awaken the inner Hulk in us all.  They satisfy a sweet or crunchy tooth without sending your blood sugar on a roller-coaster ride.

Spirulina is what gives these cookies its color and is a type of blue-green algae that comes packed with protein, vitamins A, K1, K2, B12, iron, chromium, and maganese.  With that fresh-from-the-ocean smell and taste, it's best to keep portions small and include it in recipes in which it can be camouflaged (such as these cookies or a smoothie).

I used goji berries too, to add texture, sweetness, and plant magic, but feel free to substitute with raisins or omit altogether.  The green-red combo was really pretty though!  I'm thinking I'll have to repost this recipe closer to the holidays for the Christmas celebrators.  (Can someone remind me?  I've got that mommy-brain-sleep-deprived thing going on).  ;-)

The key to the perfect crunch is allowing them to bake until the edges are golden-brown and then being patient enough to let them cool down on a cooling rack (or some other place where the air can get all around).

This recipe makes about 24 cookies.  I've had a lot of inquiries recently about serving sizes (more information to come on that).  To be technical, 1-2 cookies is a good serving for most… per sitting.  So just stand up and sit back down to have more.  Ha!  Wouldn't it be wonderful if it worked like that?!?!

Let me know if you try these and what you think.  The million $ question…did your kids like them?


In good health,

Tara

Super Green Protein Cookies

Ingredients:


Dry:

1.5 cups almond flour

½ cup ground flaxseeds

3 T dried goji berries (sub: raisins)

1 T hemp seeds

1 T chia seeds

1.5 tsp. spirulina powder

½ tsp. baking soda

¼ tsp. salt


Wet:

¼ cup coconut oil, melted

¼ cup honey

1 T vanilla


Directions:

1.    Preheat oven to 350 degrees F.

2.    In a large bowl, combine all dry ingredients and stir well.

3.    In a medium bowl, combine all wet ingredients and stir well.

4.    Add wet ingredients to dry ingredients and mix until dough is formed.

5.    On a greased baking pan, place tablespoon-sized balls about an inch apart.  Press down / flatten slightly with a fork.

6.    Bake for 10-12 minutes at 350 degrees F – until the edges are golden brown.

7.    For best results (and crunch!), allow to cool 5 minutes and then transfer to a cooling rack for an additional 20-30 minutes.

Puffed Rice Treats

Puffed Rice Treats

Puffed Rice Treats

We set out on a mission to create something new for this weekend.  With out-of-state friends coming for a visit (and one with a peanut and tree nut allergy), we decided to venture away from our usual desserts which often have nut flour or nut butter in the mix somewhere.

After seeing the packaged version of this dessert on the store shelves, I decided I would try my hand at my own version.  Puffed brown rice with no other ingredients could work as the base and sunflower seed butter would help add flavor.  Honey seemed like the perfect option to sweeten and hold it all together.

My first trial-run came out great.  So, obviously, I switched it up the real deal.  (why?!?!)  Actually, I tried to cut corners and didn't freeze them long enough before cutting and they ended up being very crumbly - but still delicious!

These are a bit sweet for me, so I plan to make them again with a lot less honey as a better (and healthier) snack option.  They may get a bit crumbly again without as much honey sticking it all together, but I don't mind the granola consistency.

***Note: Make sure to get sunflower seed butter that's not made on shared equipment in a warehouse that also makes nut butters if you're cooking for someone with food allergies.  I'm sure you all know that already!  :-/  Luckily we looked over the package together first. Although they seemed to be a hit with most, our friend with the allergy was not able to try these.  What a silly mistake!  Ugh.  Live and learn.  ;-)

Puffed Rice Treats all mixed and ready to be compacted down a bit more and frozen for a little before cutting into squares.

Puffed Rice Treats all mixed and ready to be compacted down a bit more and frozen for a little before cutting into squares.

Puffed Rice Treats

(gluten-free, nut-free, dairy-free)


Serves 16


Ingredients:


4 cups puffed brown rice

½ cup sunflower seed butter

½ cup raw honey


Directions:


1.    Pour puffed rice into a large mixing bowl.

2.    In a saucepan on the stove, bring sunflower seed butter and honey to a rolling boil.  Remove from heat.

3.    Pour sunflower seed/honey into bowl with puffed rice and stir well to combine.

4.    Spoon mixture into a pan (8x8 cake pan works well) on top of parchment paper.

5.    Using a spatula (or spoon), press down hard to compact mixture.

6.    Place in the freezer for 30-60 minutes.

7.    Remove and cut into 16 squares.  J


Do you plan on making these?  They come together in about 5 minutes.  Then just freeze for a bit and cut up into squares and you look like you've been working hard all day in the kitchen!

Let me know how yours come out.


In good health,

Tara

Banana Bread ---> grain-free, dairy-free

It's Spring break, Easter, and Passover all this week!  You may need a good dessert that doubles as breakfast and snacks for the kids this week.  It should hold up well in the freezer, be delicious, taste like a treat, and be nourishing to you, your kids, and your guests.  Am-I-right?!?!  

This Banana Bread was born out of the need to use up my mushy bananas.  I already have a freezer stash to use for smoothies and to make 'nice cream', so I wanted to make bread.  For us, it needed to be gluten-free, dairy-free, no refined sugars, full of healthy fat, protein, and fiber.  I'm fueling my busy & active body along with my family's.  And, with the things my toddler says on the regular, let me tell you, her brain is very happy with the kinds of fuel it's been getting!  ;-)  

Example from today:

Magnolia to Jagger:  "Jagger, please stop jumping in your crib.  We worked very hard for that bed and I wouldn't want to have to buy a new one and put it together again."

So, I'm sure your kiddos are just as hilarious - especially when they're getting in that good nutrition!  Leave me a comment and tell me what funny things they've said recently.  

And, make this bread immediately (if there are no egg or nut allergies in the house).  It's a good one to have on hand for a busy & special week like this one.

Banana Bread

(gluten-free, dairy-free)


Ingredients:


4 large eggs

4 bananas (ripe or overripe)

½ cup almond butter (sub: peanut butter)

4 T coconut oil, melted (plus extra to grease pan)

1 tsp pure vanilla extract

3/5 cup hazelnut flour (sub: almond flour)

1 T cinnamon

1 tsp baking soda

1 tsp baking powder

½ tsp sea salt


Directions:


1.    Preheat the oven to 350 degrees F.

2.    Combine all wet ingredients in a blender.

3.    Add dry ingredients to blender and mix well.

4.    Grease an 8X8 cake pan (ok to use loaf pan, but cooking times will vary).

5.    Pour batter into pan and bake for 35-45 minutes. (or until a toothpick inserted in the center comes out clean).  Top of bread should be golden-brown and center should be set.

6.    Allow to cool before slicing and serving. 

Matcha 'Nice Cream'

St. Patrick's Day is next week and I don't know about you, but I'm always looking for new and interesting green food ideas to make.  We're all Irish that day, right?  ;-)

With a couple of frozen bananas in my freezer that I wanted to use up, I had an idea...

But of course...Matcha Nice Cream.  This is a dairy- and gluten-free version of ice cream that you do not need an ice cream maker for!  And, get this…you only need 3 ingredients.

Ingredients:

  • 2 large bananas, sliced and frozen
  • 1/3 cup non-dairy milk (cashew milk used here)
  • 2 T matcha (green tea) powder

Directions:

  1. Combine all ingredients in a food processor or blender until creamy.
  2. Spoon into freezer-safe container.  
  3. Eat as is for a soft-serve consistency or freeze for 1-2 hours for a traditional ice cream texture.  If you're feeling fancy, use an ice cream scooper.

Enjoy this healthy sweet treat alone or with Leprechauns…whatever!  ;-)

In good health,

Tara


Marie Claire LIVE - Meal Prepping and Saving Money!

This past Tuesday, I had the opportunity to share my top tips on lowering your grocery bill and eating healthy through meal prepping LIVE on Marie Claire.  Shout out to #TheFix host, Brittney Levine and videographer, Rosa, who were as sweet as can be!  We had fun and the time FLEW!  I want to share a couple more tips with you guys that I didn't get to mention in the shoot.

1) Choose the day and time you will be going shopping.  Avoid shopping while hungry or rushed. Those hunger pangs will steer you right towards the impulse buys at the check-out counter…not wallet- (or health-) friendly.  By choosing a time when you are a bit less rushed, you will likely take a few extra minutes comparing prices and nutrition labels…key items to be successful with your shopping trip!

2) Decrease food waste.  In your planning phase, make a "use first" column that includes produce and leftovers that may go bad in the next day or two.  Be creative and find ways to use up those items before making something new.  

3) If you can't use the seen-better-days food up in time, use your freezer!  Bananas freeze well and can be thrown into smoothies or banana bread.  Veggies can be pureed into a soup and frozen that way.  What about herbs?  Divide them up into ice cube trays with some olive oil (or whatever liquid you might use them with).  This is a great tip to help your groceries last a few extra weeks and months.

What are your favorite tricks to save money while staying healthy?

Red Velvet LOVE Brownies

February is in full swing as we are approaching the middle of the month already.  How?!?  With the famous groundhog forecasting 6 more weeks of Winter, I suppose we should've been expecting the blizzard we were met with today on Long Island.

Snow and all, February is a time for love, heart-shaped everything, shades of pink and red, heart health, and lots and lots of…chocolate!!

So, what if you're on a roll with upgrading your health so far in 2017, but still looking for something that looks and tastes like an indulgence?  What if you or a family member have some food allergies / sensitivities that prevent you from being able to eat most of the store-bought or homemade recipes out there?  I hope this Red Velvet Love Brownie recipe fills that void for you!

These bad boys are gluten-free, dairy-free, high in protein and fiber, and contain healthy fats plus a full serving of veggies.  They're chocolate-y, yet low glycemic…how's that for showing your heart some love this month?!

Black beans in brownies?!?! &nbsp;Yup! &nbsp;They work great for texture, color, and add lots of nutrition! &nbsp;

Black beans in brownies?!?!  Yup!  They work great for texture, color, and add lots of nutrition!  

Beets bring the "red velvet" hint of color while adding a bit of subtle sweetness.

Beets bring the "red velvet" hint of color while adding a bit of subtle sweetness.

Brownie batter all mixed up.

Brownie batter all mixed up.

Red Velvet Love Brownies

Ingredients:

  • 1 (15-oz) can of black beans, rinsed (BPA-free can)
  • 2 large eggs
  • 1/2 cup beets (sliced and cooked - either roast in oven or buy a jar)
  • 1/3 cup honey
  • 3 T coconut oil, melted
  • 1 T water
  • 1 tsp pure vanilla extract
  • 3/4 cup cacao powder
  • 1/4 cup unsweetened / dairy-free / gluten-free chocolate chips
  • 1.5 tsp baking powder
  • 1/4 tsp sea salt

Directions:

  1. Preheat oven to 350 degrees F.
  2. Mix dry ingredients in a large bowl.
  3. Mix wet ingredients in food processor, high-speed blender (keep scraping sides down), or with a mixer.
  4. Combine wet ingredients into bowl with dry ingredients and mix well.
  5. Pour into well-greased muffin tin or line with paper liners.  This makes adorable, round brownies with slightly crispy edges that are like getting the highly sought-after corner piece each time.  ;-)
  6. For the look pictured up top (with the heart in the middle), cut a beet slice into the heart shape and press onto top.  Other ideas for toppings include: chocolate chips, hemp seeds, walnuts, or anything else your creative mind comes up with.
  7. Bake 20-25 minutes - until edges start to pull away from muffin tin and become slightly crispy.
  8. Share with your favorite people!
Little hands couldn't wait for me to finish the photo shoot. &nbsp;;-)

Little hands couldn't wait for me to finish the photo shoot.  ;-)

Red Velvet Love Brownies with various toppings.&nbsp;Pictured (starting top left and going clock-wise): Walnuts, chocolate chip and hemp seeds, heart-shaped beet, chocolate chip.

Red Velvet Love Brownies with various toppings. Pictured (starting top left and going clock-wise): Walnuts, chocolate chip and hemp seeds, heart-shaped beet, chocolate chip.

Alright guys…will you dare to try these?  It is definitely "different" to bake with black beans, but they taste so chocolate-y and are healthycome on now!  Brownies for lunch, anyone?

In good health,

Tara

Game Day Recipe

Whether you're hosting your friends and family or visiting someone else to watch The Big Game (a.k.a. Superbowl) this Sunday, there's a few things that remain top of mind on this not-quite-a-holiday holiday…football, half-time shows (wardrobe malfunctions?), commercials, and…FOOD!

What are you making?  What are you bringing?

This Crunchy Cauliflower recipe is perfect for Game Day.  It works as a snack, an appetizer, or a side dish.  It's delicious as-is, or can be paired with your favorite dip or sauce if you want to be fancy.  This recipe is vegetarian, gluten-free, dairy-free, paleo-friendly, high protein, high fiber, and of course a serving of veggies!  And…it's toddler-approved (actually, toddler-obsessed!).

Crunchy Cauliflower Bites

Ingredients:

  • 1 head of cauliflower
  • 4 T coconut oil, melted
  • 1 large egg
  • 1/3 cup almond flour
  • 1/3 cup nutritional yeast
  • 1/2 tsp sea salt
  • 1/2 tsp pepper
  • 1/2 tsp paprika

Directions:

  1. Preheat oven to 425 degrees.
  2. Chop cauliflower into bite-sized florets.  Place in large bowl.
  3. In a medium bowl, combine almond flour, nutritional yeast, salt, pepper, and paprika. Mix well.
  4. Add coconut oil and then beaten egg in the bowl with the cauliflower.  Mix well.
  5. Add dry mixture from medium bowl into bowl with the cauliflower and mix until evenly coated.
  6. Spread cauliflower evenly onto a greased baking sheet.
  7. Bake 7-8 minutes, flip, and bake another 7-8 minutes.  The cauliflower should be crispy and a bit brown on the edges.
  8. Eat up!

Happy Friday, everyone!

In health,

Tara

Almond Flour Versatility

You have almond flour.  It's sitting in the back of your pantry.  It may have dust on it!?  You bought it for that recipe you made a few months ago - ya know, when you were super-duper gung-ho on your gluten-free / paleo / Whole30 / healthy-mama-and-family kick?  Now what?

Guys, almond flour is not an ingredient that should come with buyer's remorse.  It's SO versatile!  Full of plant protein, healthy unsaturated fats, and heart-and-body-loving fiber, it should be allowed into the spotlight of your food prep just a bit more. ;-) 

Almond flour can bring added nutrition and goodness in many ways:

  • Healthy baking - it's the perfect alternative to regular bleached or whole wheat flour for those with food sensitivities and those just looking to step up their health game.
  • Thickening agent - add slowly into soup, stews, dips, sauces, and even hummus if you need a slightly thicker or more dense consistency.
  • "Protein powder" - throw into smoothies, healthy fudge, in yogurt, oatmeal, energy balls, sauce…anywhere you may need a little boost in protein.
  • "Breading" - Mix with some spices and herbs for a quick and easy replacement for breading.  Make your own mozzarella sticks, breaded and baked chicken, or zucchini fries by dipping the food in egg first and then in the almond flour/herb mixture. Yum!  This is the perfect appetizer swap (hmm….SuperBowl, anyone?).


So, will you dust off that bag of almond flour (or just go ahead and buy it already)?!?!  What do you like to make with this powdered beauty?

I'd love to hear from you if there are any other ingredients that haven't been in your meal prep rotation in a while….or any products/ingredients you've been wanting to purchase, but just can't justify since you don't know what to do with it after that. ONE. recipe.  Let me know!  Maybe I'll feature it in an upcoming post.  ;-)

Make it an awesome, almond-y day!

In health,

Tara

Cake Smash Success! (Jagger Turns ONE)

Well how did THAT happen?  365 days and boom...Jagger-dude is 1 year old.  

He is the most perfect compliment to our crazy family.  His smiles and laughs make strangers smile and laugh everywhere we go.  He loves to be silly and mobile and hi big sister - well, he's a BIG fan of hers.

Some of you already know that our babies came with a little (lot of) help from science.  They were IVF miracles.  They also each survived a terrible pregnancy disease I had both times called Hyperemesis Gravidarum.  All this just to say, we are so. incredibly. BLESSED!

I believe we can find reason in everything we experience.  "If it doesn't kill you, it makes you stronger." (One of my favorite quotes since I was a kid - from Nietzsche).  Our experiences have brought me to where I am today…I value my family and our health above all else.  I know what it's like to long for each of these.

Well, hello there! &nbsp;(Jagger-dude - a few months old)

Well, hello there!  (Jagger-dude - a few months old)

To my sweet Jagger Jack, Happy 1st birthday!  We knew we loved you long before you joined us Earth-side.  You've been such a bright star in our lives over the past year.  I have loved every minute of our 365 days together - watching you grow, play, and learn.  I can't wait for more todays and tomorrows with you!

Babywearing has saved me this year! &nbsp;Having free hands to chase after big sis is always a good idea.

Babywearing has saved me this year!  Having free hands to chase after big sis is always a good idea.

Now on to parties and cake smashes.  Here's what I learned:

  1. January birthday parties in NY need snow dates as a back-up plan.
  2. Using blueberries to color the icing actually makes purple icing, not blue.  Jagger is a very secure little dude, he doesn't mind purple….but, it didn't quite fit into the "Winter One-derland" theme that we were going for.  ;-)
  3. Sometimes the "cake smash" turns out to be more of a cake fondle.  And that's cool!  He enjoyed it, and that's all I was hoping for.
We may have had to reschedule Jagger's party, but at least we got an unexpected day to play in the fluffy white stuff!

We may have had to reschedule Jagger's party, but at least we got an unexpected day to play in the fluffy white stuff!

I started feeling pretty nostalgic as I made this recipe - the same one I created originally for Magnolia's first birthday.  I was a newbie to healthy baking, at that time, and ended up making about 7-10 versions of this one before it was "right".  That was wayyy back in 2014.  ;-)  I've come a long way!  Now I have TWO adorable reasons to keep me on top of my healthy baking (and cooking) game.

Magnolia enjoying her smash cupcake 2+ years ago at her 1st birthday party. &nbsp;It's incredibly bittersweet to see how much she's grown in body and mind and how fast our memories are piling up as the months fly by.

Magnolia enjoying her smash cupcake 2+ years ago at her 1st birthday party.  It's incredibly bittersweet to see how much she's grown in body and mind and how fast our memories are piling up as the months fly by.

This was also the start of the muffin magic.  What the heck is that muffin magic, you ask?  Well, it's figuring out that muffins can be made of all the healthy stuff you want your kiddos and your whole family to eat!  We're talking veggies, fruit, protein, healthy fats, and fiber.  I don't hide anything in there as I believe it's in the kiddos' best interest to know they are eating veggies and all the good stuff to give them the best foundation of health that you can.  So grab the little ones and let them help measure and mix and get very familiar with these healthy ingredients!

*Note: This recipe is for muffins.  Add the icing and voila - you have cupcakes!

Pumpkin Batter all mixed and ready for the muffin pan.

Pumpkin Batter all mixed and ready for the muffin pan.

"Happy birthday to you…" 

"Happy birthday to you…"


Pumpkin Carrot Muffins

Ingredients:

  • 2 ripe bananas
  • 1.5 cups pumpkin puree
  • 1/2 cup sliced carrots (optional)
  • 1 T coconut oil
  • 2 eggs
  • 1.5 cups almond flour
  • 1/5 tsp baking powder
  • 1 tsp cinnamon
  • 1/4 tsp nutmeg
  • 1/4 tsp ginger
  • 1/4 tsp sea salt

Directions:

  1. Preheat oven to 350 degrees F.
  2. Blend together all wet ingredients in a blender.
  3. In a large bowl, mix together dry ingredients.
  4. Slowly pour wet ingredients from blender into the bowl with the dry ingredients.
  5. Fill greased muffin pan (or muffins liners) 2/3 full.
  6. Bake 30 minutes.

*Makes 12 muffins.

"Is the goal to shove as much of this in my mouth as possible, mama? &nbsp;'Cause that I can do!" 

"Is the goal to shove as much of this in my mouth as possible, mama?  'Cause that I can do!"


I switched up the kind of icing I made this time, as I wanted a nice shade of blue to go with our "Winter One-derland" theme.  Hmm.  That didn't work out, but it was a very pretty purple color. Haha.  And it was tasty!

Blueberry Coconut Cream Icing

Ingredients:

  • 1 can coconut milk
  • 2 T coconut oil (not melted)
  • 1 T raw honey
  • 1/2 tsp pure vanilla extract
  • 1/2 cup frozen blueberries

Directions:

  1. Place can of coconut milk upside down in fridge overnight.
  2. Carefully open can and scoop out the hardened coconut cream.  This is what you will be using for the icing.  Save the watery part to use in other recipes.
  3. Mix all ingredients in a blender (you will need to keep scraping down the sides and blending several times).
  4. If you make in advance, it's ok to refrigerate icing, just be sure to give it a good blend/whipping before you use as it will harden a bit.


Jagger seems as surprised as we are that he's ONE already!

Jagger seems as surprised as we are that he's ONE already!